Buy Digital Content by clicking the image below

Panstoria Digital Content

Buy Artisan by Panstoria by clicking the image below

Panstoria Artisan

Buy Historian by Panstoria by clicking the image below

Panstoria Historian

If you do not see the images above click on this link

Capture Lifetimes (click image below)

Capture Lifetimes (click image below)
Link to print your books. Please use Cowens as your distributor code, so I receive credit.

Instructions for printing your book

Link to instructions on how to print your book with Capture Lifetimes. http://www.4shared.com/web/preview/doc/LCXxhZMZ

Sunday, July 19, 2009

Magic Wand & More Webinar


Join Julie Howell as she teaches us how to use the cutting tools in StoryBook Creator Plus. Using the cutting tools you can create pages like these and more. She has so many great ideas to share with you.

Click on the link to watch this webinar http://tinyurl.com/nwayda

Friday, July 17, 2009

Changing Predesigned Papers

1. Find the paper you want to use. (from With Love Digital Kit)

2. We want to remove the flowers

3. Use the Rectangle cuter tool and adjust the size to be just around the first flower. Move the rectangle to the area to copy from.

4. Choose copy the shaded area

5. Move the copy over the top of the flower to hide it. Group the two elements together. You can use your arrow keys to move the copied area and keep them exactly lined up.

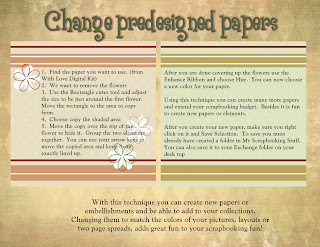
After you are done covering up the flowers use the Enhance Ribbon and choose Hue. You can now choose a new color for your paper. Using this technique you can create many more papers and extend your scrapbooking budget. Besides it is fun to create new papers or elements.After you create your new paper, make sure you right click on it and Save Selection. To save you must already have created a folder in My Scrapbooking Stuff. You can also save it to your Exchange folder on your desk top.

With this technique you can create new papers or embellishments and be able to add to your collections. Changing them to match the colors of your pictures, layouts or two page spreads, adds great fun to your scrapbooking fun!

StoryBook Tricks & Tips


Drop Down Menues Any of the drop down menus can be moved. Left click, hold and drag, on the top colored bar. You then can move them anywhere and can see what is under the drop down menu.

Text Ribbon Use the Sample dropper to copy a text box with all the formatting.Use the Apply dropper to copy and paste all text box formating to a new text box.

Changing a background paper to normal Unlock the background paper by clicking on the yellow lock and making it go grey. Right click on the background paper, and choose Order.The left click on Make Normal (not background)

Photo Boxes If your photo box is landscape and you need it to be portrait. Right click on the photo box, choose Aspect Ration. On the next window you can choose a different size and orientation.

Always remember that you can right click on your mouse and get different menus.

Wednesday, July 1, 2009

July new products

Have you checked the new products that are available in our digital collections. With the 4th of July upon us this is one fun package and one of my favorites. There are lots more packages, to create your pages from, check them out at this link: http://tinyurl.com/npjwpz