Buy Digital Content by clicking the image below

Panstoria Digital Content

Buy Artisan by Panstoria by clicking the image below

Panstoria Artisan

Buy Historian by Panstoria by clicking the image below

Panstoria Historian

If you do not see the images above click on this link

Capture Lifetimes (click image below)

Capture Lifetimes (click image below)
Link to print your books. Please use Cowens as your distributor code, so I receive credit.

Instructions for printing your book

Link to instructions on how to print your book with Capture Lifetimes. http://www.4shared.com/web/preview/doc/LCXxhZMZ

Thursday, May 28, 2009

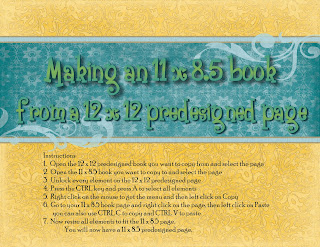
Copy one size page to a different size

Instructions
1. Open the 12 x 12 predesigned book you want to copy from and select the page
2. Open the 11 x 8.5 book you want to copy to and select the page
3. Unlock every element on the 12 x 12 predesigned page
4. Press the CTRL key and press A to select all elements
5. Right click on the mouse to get the menu and then left click on Copy
6. Go to your 11 x 8.5 book page and right click on the page, then left click on Paste you can also use CTRL C to copy and CTRL V to paste
7. Now resize all elements to fit the 11 x 8.5 page. You will now have a 11 x 8.5 predesigned page.

Watch the video to see how to copy the pages.

High quality picture and sound:
http://dc145.4shared.com/download/108436916/f68232d5/2009-05-28_1607_Webinar_Now.wmv

Low quality picture and sound, but downloads faster:
http://dc145.4shared.com/download/108436916/f68232d5/2009-05-28_1607_Webinar_Now.wmv

Wednesday, May 20, 2009

Understanding Your Computer

This a webinar presentation given May 20, 2009 on "Understanding Your Computer." and is 50 minutes long. It covers Memory Manager, Storybook Creator Plus and your computer. There is also a handout in the files section at the right on this blog, that can be downloaded.

Click on the link to watch the webinar.

High quality picture & sound:

http://www.4shared.com/file/108045369/1fef0dbd/2009-05-20_1204_Understanding_Your_Computer.html

Low quality picture & sound, but downloads faster:http://dc152.4shared.com/download/108045369/1fef0dbd/2009-05-20_1204_Understanding_Your_Computer.wmv

Please send any feedback you may have about the webinar. To bobsiglow@msn.com

Thursday, May 14, 2009

Plaid Overlay

1. Using the Digital Overlays-With Love, choose the one that has a boarder on the top and bottom with 3 flowers.
2. Use the tools tab and choose the Rectangle cutter. Cut the top just above the flower. Make two more copies and align them. Group all three and then flatten.
3. Copy the flattened image and past it. Rotate the copied image by right clicking and choose properties. Rotate it 90 degrees.
4. Flatten the two together. Use the Tools ribbon and choose the Rectangle cutter. Select Make a Square and cut the center out, erasing the outside edges.
5. Finished Page: You now have an overlay that can be filled with gradients, color or papers. You can use a layout like this page only filling in the corners with photos and the center with journaling.

NewsFeed

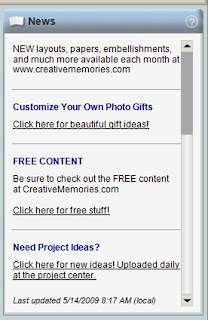
If your Storybook Creator Plus, News does not look like this picture, it can be fixed. Make sure your Storybook is closed.

For Windows XP:
Open My Computer
Open the "C" drive
Double click on "Documents & Settings"
Double click on your name folder
Double click on "Application Data"
Double click on "Creative Memories"
Delete the file called "NewsCache"

For Windows Vista & Windows 7, it is a different ball game. Here is what you need to do.
Open My Computer
Press the ALT key to get the Menu bar and click on Tools, then open Folder Options, on the View Tab look for Hidden files and folders and click on Show hidden files, folders, and drives, then click ok and close that window
Double click on the "C" drive
Double click on Users
Double click on your user name folder
Double click on AppData
Double click on Roaming
Double click on Creative Memories
Delete the folder NewsCache
Open StoryBook Creator and the newsfeed should be fixed.

If this does not work, call Tech Support at 866-440-2420

Saturday, May 2, 2009

Font Installation

Have you had problems installing new fonts with Windows Vista? Well here is your answer, and it works wonderfully for my computer. Here is the link where I found the answer.
http://www.lytebyte.com/2007/07/03/how-to-install-new-fonts-in-windows-vista/

Here are the steps if you do not want the link:
  1. Go to Control Panel ->Appearance and Personalization -> Fonts
  2. You will be taken to the System's fonts folder. Right click anywhere inside the folder and click add fonts. You will be given a pop-up box which will aid in installing new fonts.
  3. Using the Drop down menu at 'Drives" and NetWork", select the folder where you have kept the new font files.
  4. The font files may be in different formats like Type 1, True Type or OPen Type.
  5. If the folder you have selected has any font files in these formats, it will be listed under 'List of Fonts'
  6. You can preview each font style below by highlighting them. To install, just select the font files you want to install and click 'Install.'
  7. Make sure you have selected 'Copy Fonts to fonts folder,' so that you can manager all the font files easily.

A good place to get free fonts is http://www.dafont.com/

May - June New Products

Check out all the new products at my website at www.mycmsite.com/sites/cathieowens

We have the new Memory Manager 3.0 which is a fantastic new program features.

And look at the new kits, they are so much fun and we could create a lot of great pages with them.