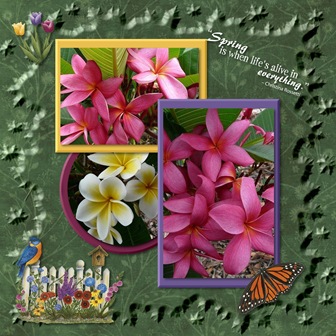
Buy Digital Content by clicking the image below

Panstoria Digital Content

Buy Artisan by Panstoria by clicking the image below

Panstoria Artisan

Buy Historian by Panstoria by clicking the image below

Panstoria Historian

If you do not see the images above click on this link

Capture Lifetimes (click image below)

Capture Lifetimes (click image below)
Link to print your books. Please use Cowens as your distributor code, so I receive credit.

Instructions for printing your book

Link to instructions on how to print your book with Capture Lifetimes. http://www.4shared.com/web/preview/doc/LCXxhZMZ

Thursday, July 22, 2010

Webinar, templates and more

July 22, 2010 webinar focused on many topics.  Covered were:

1) reviewing your book before printing

2) how to insert text from other sources

3) Memory Manager auto rotate of photos, and calendar find

4) shapes and changing their colors

5) create fast pages using your own design, predesigned pages

6) making templates and saving them for use later

Click here to download the recorded webinar Webinar, templates and more.

image


image


Here are some of the screen shots with instructions that were shown in the webinar.  Click on them to open in your internet explorer and then go to File> Print, to print and save.

Book for print preview - Page 003

Inserting text - Page 004

MM calendar selection - Page 006

Shape colors - Page 007

Saturday, July 17, 2010

New Webinars

Here are some new webinars to teach you some new tricks, and what is new.  Madelyn Brownell does a great job teaching and these are no exception.  Have fun watching and learning.

New Webinars

July 14, 2010 – lunch time webinar by Madelyn Brownell

June 24, 2010 - lunch time webinar by Madelyn Brownell

June 6, 2010 – lunch time webinar by Madelyn Brownell

Thursday, July 15, 2010

Celebration time is here again.

I used the new Disney Pixar Cruisin Cars kit for this page.  On the photo mat background, I used a color, 3-D, put a texture to it, and a heavy shadow.

image

Monday, July 5, 2010

P2P Digi love is being spread here!!!

You need to head on over to www.pixels2pages.net and learn all that our Pixies have to offer.  

Would  you please send your feedback to either or all of these: Go to your consultants website, and when you click on the Project Center then click on Digital, there is a "Send Us Your Feedback" link or your can copy this email address: ideafeedback@creativememories.com   Also make sure you send your feedback to info@pixels2pages.net.  Here is the home address if you want to write a letter.

Creative Memories Home Office
3001 Clearwater Road
P.O. Box 1839
St. Cloud, MN 56302-1839

Consultants go to the CMC-Network and scroll all the way to the bottom and there is “Questions/suggestions” click this link and then choose “Other” and submit your feedback.

Our Pixies would love to hear your comments and feedback, on how P2P has helped you start and finish your projects.  Any ideas you have loved, things you wish they would teach us and in general any kind of feedback you are willing to share.  Come on join in the digi love and share it with everyone you know. 

image

The background paper is from the new Disney Fairies Digital kit.  The text box font is Andy 16 and the font for the banner is LongIsland 48.

Happy Scrappin’

Friday, June 25, 2010

Sunset

The other day my husband took me for a ride so we could take pictures of the sunsets over Salt Lake City.  The view was beautiful that night and so were the colors.  Enjoy your new template! 

The center shape has the opacity turned down to about 50%, used one of the photos as the background and sampled the sunset for the text.  The embellishment is one of the freebies from the P2P website, with the glitter added, 3-D filter and heavy shadow.

image

New Webinars

Well it is about time, there were more lunchtime webinars posted to this blog.  Sorry for being so slow getting around to posting them, sometimes life gets in the way of things we most want to do.  So lets play a little catch up here!  Remember the files are large and take time to download, so be patient.

Edges, Corners, Alpha Shapes and more by Cathie Owens

Lunch time webinar by Madelyn Brownell – May 13, 2010   covering click and fill pages, MM star ratings, calendars & more

Lunch time webinar by Madelyn Brownell – March 19, 2010  covering content manager, keywords and more

Remember there are a lot more webinars on the right side of this blog under the category “Webinars to learn Storybook & Memory Manager”

Tuesday, June 22, 2010

Pixels2Pages.net

image

Have you checked out Pixels2Pages.net yet?  If you have not, you are sure missing out on a lot of great helps, ideas, webinars and blueprints!  These ladies are FANTASTIC, in the ideas they have taught us.  This site has been in a beta test for 3 months and that time will be up July 15th.  Come on everyone get on over there and check out what is going on.  What are you waiting for?   Please give these Great Ladies your feedback, CM is waiting to hear how it has helped you.

I have a friend Bonnie, that said she copies the pages into Memory Manager and then writes the instructions so she can remember how to make the pages at a later date.  What a GREAT idea Bonnie!  So everyone get on over there and create all the pages, save them in Memory Manager and write the instructions too.  As for me, I burn the trees and print, print, print everything.  So now I have a binder 2” thick.  Bonnie, is saving the trees.

It sure is fun the different ideas we can learn from each other.  You ladies are all so much fun, and I love hearing from all of you. 

Here is a sample of the latest blueprint on the Pixels2Pages.net website.  There is no link for this file, you have to visit the site to get the blueprint.

image

Happy Scrappin’

Saturday, May 29, 2010

Font Shapes

Font Shapes - Page 032

Have you purchased a few new fonts (some are shapes & not fonts) and can not find them?  That is because, you use them differently than the rest.  There are two at the present time that are Alpha Shapes and not the regular fonts.  They are Playful Digital Alpha Shapes and Formal Digital Alpha Shapes. To use these alpha shapes use the following instructions:

  • on the content ribbon click Shapes
  • Select Alpha shapes, and then the one you want to use (I created a folder in content manager for my Alpha Shapes), if you do not have them listed in a folder you will have to find them.
  • You will then letter by letter select the ones you need, using one of the following choices: 1) create this shape, 2) cut this shape out of a piece of paper, 3) apply this shape to text.

You will now be able to resize, move and apply filters to your font shapes. 

Have fun with these, as the possibilities are endless!!

Friday, May 28, 2010

Tropical page

A big thank you to Brenda DeJong.  She has some really fun templates.  Here is her blog address, if you are interested if seeing what she has http://www.scrapitdigi.blogspot.com/

Tropical-Brenda DeJong - Page 063

The other day, I thought it would be fun to turn the macro feature on, on my camera and shoot a bunch of flowers.  These are all in my yard this time of year.  Pansies are a favorite because of their beauty and different colors.  Lilacs are a favorite because of their fragrance and forget-me-knots remind me of you youth.  When I was a teenager I asked my Dad if I could plant some flowers, and he agreed.  However, over the years, he had a hard time getting rid of the forget-me-knots.  He use to say “how can I forget you Cathie, I can not get rid of those flowers, they are like weeds.” 

Have fun and happy scrappin’

Saturday, May 22, 2010

Template tidbit

templated tidbit - Page 035

What is a template or blueprint you may ask?  Well simply put, it is a predesigned page with shades of greys or blue.  You select the element, and choose "fill the item with" and choose your background and embellishments.  Then you drag your photos on and your pages are done quickly.

When you download a free template, save it to a file on your desktop.  I like to save them in my "exchange folder."  After you have downloaded the template open StoryBook if it is not already open. 

  • click on the home ribbon
  • click on import page
  • go to the folder, where you downloaded the template to
  • click on the template and then in the bottom right corner click on get pages

This will bring the pages in at the bottom of your project.  You will then need to left click on the page and drag it into the order you want the page to be.  If you have never made a folder on your desktop, right click on top of the desktop.  Choose "New" then "Folder"  At this point name your new folder, as it should be highlighted in blue, unless you hit the enter key.  In which case you would right click again on the folder and choose rename, then you can name the folder "Exchange Folder" 

Remember that your exchange folder is for things going into or out of the folder.  Example:  you download a template and bring it into Storybook, or you save your page and want to upload it to your favorite photo center for printing.

Friday, May 21, 2010

Little tidbits

White edges - Page 034

Would you like to get rid of the white edges some of our papers have?  Well there are three ways to accomplish this task.

  • 1st - in the Elements panel unlock the background. Then click on Order, next click on Make normal (not the background)  Then you will be able to stretch the paper to eliminate the white edge. 
  • 2nd - after your paper is on the page, right click and then choose flatten.  You will then be able to stretch the paper and eliminate the white edges.
  • 3rd - choose your paper and drag it to your page instead of choosing make the background and then stretch it to eliminate the white edges. 

Another thing I have been doing, so that the paper can be used as "fill this element" option, is to cut the paper with the rectangle cuter.  Next, right click on the paper and choose "Save as Content"  Save it in Your stuff as paper and you can name the paper at this point.  Now you will be able to use the papers without the white edges. 

Friday, May 14, 2010

Cute as a Bug page

This page was made with the new Cute as a Bug digital kit.  This is such a fun kit for little boys. 

Cute as a bug - Page 026

Thursday, May 13, 2010

Celebration time page

It is time to celebrate the 100th follower of this blog.   This page is 12 x 12 size.

This page was built using our new Wishful Digital Kit.

Samples and play pages - Page 023

Tuesday, May 11, 2010

Importance of sharing

About six months ago I had to opportunity to listen to Rhonda Anderson.  Wow, what a fantastic night it was, to listen to her and her story, of how Creative Memories got started.  If she were ever to come to Salt Lake City again, I would drop what I was doing and go and listen to her again.  She is one fantastic woman, and listening to her just inspires you to want to be and do better in recording those precious memories.  Here is a copy of a post by her from http://blogs.creativememories.com/why/2010/05/how-important-is-sharing.html  I felt it was important enough to share here on my blog. 

Recently I received a letter from a Creative Memories Consultant. And, as I read, I was  filled with gratitude for the thousands of you who have felt called to share the Creative Memories Mission so effectively. Because of you, countless people’s lives have been touched by their pictures and stories.


More than that, Creative Memories Consultants inspire each other. Here is an excerpt from that letter: “As a CM Consultant, I have grown in many areas because of the people I have worked with. And I covet the relationships that were created. They have helped me to be more outgoing and a stronger person than what I was. But most of all, it's the special people that I would have never met if Creative Memories hadn’t brought us all together! And my albums are a forever treasure.”


Wow, what a lovely message that reminds us of the powerful relationship building that happens when you share Creative Memories. And there is such strong documentation that supports the power of relationship building through pictures and stories.


Here's some interesting information I learned from child psychologist, Dr. Ken Condrell. Dr. Condrell specializes in helping children recover from depression and trauma. He says, “ALL children, no matter if they have stress in their life or not, need to have strong self-esteem. And viewing family photo albums with children emphasizes what is right about a child’s life and shows children that the bad stuff is temporary. Pictures and stories offer proof of how they are loved. Everyone, no matter their age, needs photo albums to build their self-esteem and give them hope.”


I wish everyone in the world could have at least one album about their life. In fact, in our Ten Questions Idea book there is a chapter called “Life is Great.” The chapter includes questions about your great family, friends, faith and more. An album like this is easy to create, yet holds so much power to show love and encouragement to people of all ages.
Like Dr. Condrell confirms, pictures and stories unite us, strengthen relationships and help us to be more grateful. Completed albums are one of life’s most powerful tools and we need to help MORE people to experience that blessing. I am so grateful to be serving alongside amazing people like you –- Creative Memories Consultants and customers –- as we help the world see their GREAT LIVES captured in albums. 

Thursday, May 6, 2010

What’s New in May and other tips

This webinar covers what is new products in May 2010.  Also covered in the webinar

  • how to sort your pictures in StoryBook
  • working with masks and overlays
  • cutter tools and shapes
  • photo touchups and understanding the histogram

Join this webinar and learn some fun tips and techniques.  What’s New in May and other tips

Thursday, April 29, 2010

Edges and photo frames

This webinar was recorded April 29, 2010.  The first 2 1/2 minutes the sound is missing, so be patient with the recording.  You will learn how to create edges using the Cut & Fill ribbon cutters.  Also how to frame your photos and change the colors and shapes.  Hope you enjoy this webinar Edges and photo frame webinar - click here

Pixels2Pages.net

image 

Hey all you digital scrapbookers if you have not already checked out Pixels2Pages.net, you are totally missing out.  There are so many new and fun ideas.  There are blueprints you can download and use to create your new pages.  There are instruction sheets and webinars to learn from.  These ladies are AWSOME that have created the site.  So what are you waiting for, get on over to www.Pixels2Pages.net and check it out. 

Here are just two sample pages of what I created learning some of the fun techniques from the Pixels2Pages website.  You will learn how to make the globes, make plaids and so much more. 

Sphire - Page 031

orange globe - Page 016

Tuesday, April 20, 2010

Creating new packages, folders and shapes

Here are some instructions on how to create new folders and packages in the Content Manager of StoryBook Creator.  Also there are instructions on how to create your own new shapes, using any image.  Click on the page to make it go larger and open a new window.

Content and Shapes - Page 020

Content packages, folders & shapes - Page 019

Text from content packages page

You have to be in Content Manager to create new folder or package

1.  click the + sign

2.  click on Create user content package

3.  enter the new Package name

4.  choose the drop down arrow and choose the folder you want to place the new package in, such as My Stuff.

Text from creating shape page

Start with your shape picture.  If you do not have one use google and search for a photo that has a shape you want to create.  For this example, I went to google and searched for pictures of flowers.  When you find the picture you want right click on the photo and choose Copy.

1. back in Storybook right click and choose paste and your picture is now on your page

2.  click on your picture to make it active

3.  click on the insert ribbon

4.  click the down arrow under Shape

5.  click on Custom shape using curved lines

6.  click around the desired shape you want to create, in the bottom left corner is Edit Points, if you need to change any points

7.  when you are satisfied with your shape outline, click Save this shape as content, select the correct folder to save your shape in

8.  on the Custom Shape window now click close

To use your shape

9.  You must first create a text box and write your text, then with the text box selected go to the format text ribbon

10.  choose Text shape and click the down arrow

11. go to the folder where you saved the new shape and select it

Sunday, April 18, 2010

New Edges in Storybook

Have you had problems finding the new edge you purchased from CM?  I have read several comments lately on facebook groups about this very problem.  So here are you instructions on how to find where they are located.

Edges - Page 015

Happy scrappin’

Friday, April 16, 2010

Lace edge

 Dance lessons - Page 016

The lace edge was made from the new edges package, that came out the first of March.  These papers are from the new Dance Digital Additions kit.  Here are the instructions to build your own lace edge.

Lace instructions - Page 025

Wednesday, April 14, 2010

Africa 12 x 12 pages

I was asked by a friend to help put her pictures of her trip to Africa in a book.  I designed the layouts of these pages and we were able to place lots of photos within 74 pages.  She was so pleased with her book.  She shares the book with all her violin students and their parents.  The middle pages is not of Africa, it is my family. 

Kilimanjaro - Page 007

Kilimanjaro - Page 047

Kilimanjaro - Page 018

Kilimanjaro - Page 012

Kilimanjaro - Page 035

Fun 12 x 12 pages

I was asked by a friend to help put her pictures of her trip to Africa in a book.  I designed the layouts of these pages and we were able to place lots of photos within 74 pages.  She was so pleased with her book.  She shares the book with all her violin students and their parents.  The middle pages is not of Africa, it is my family. 

Kilimanjaro - Page 032

12x12 templates - Page 049

Kili page - Page 050

Thursday, April 8, 2010

Edges, Edges, Edges

borders new - Page 013

Here is a webinar that will show you how to create edges from any shape you you have in StoryBook Creator.  There are so many possibilities and could spend hours playing, experimenting and creating.  Edges webinar link

Happy Scrappin’

Sunday, April 4, 2010

Colorize photos

Colorize - Page 018

Steps to create and colorize photo

  • flatten your photo
  • use the custom cutter and go around the area you want to color.  Make sure you have the shaded area on the part you want to color
  • use the "copy the shaded area"select the copied portions and click on the format ribbon and select Threshold.  Select your colors (2) and then adjust the slider for the desired coverage. 
  • You can also use the rubber stamp to create a softer color and look.

Thursday, April 1, 2010

Memory Manager recycle bin

Learn how to clean out all your deleted photos from your Memory Manager recycle bin.  Some people might thing that when you delete photos in Memory Manager that the deleted photos go to your computer recycle bin.  This is not the case, Memory Manager has it’s own recycle bin and you should keep it cleaned out to free up computer memory. 

This webinar will show you how to empty the recycle bin.  Memory Manager recycle bin webinar

Get those photos off your computer and into your lives using Memory Manager and Storybook Creator Plus.  Get your books printed to preserve the memories. 

Happy Scrappin’

Sunday, March 14, 2010

12 x 12 Template from Nancy Cernak

Spring in the Rockies - Page 053 

Created by Nancy Cernak. She has a group called I *heart* Creative Memories! on FaceBook

Happy Scrappin’

Saturday, March 13, 2010

12 x 12 page From FaceBook

bugs - life  - Page 014

Here is a new page I found from one of the facebook groups.  This one was really a lot of fun and there are a lot of possibilities.  Background paper and flowers are from the Simply Beautiful Digital Power Palette, lady bug is from the Simply Beautiful Spring Digital Additions.  I think the magnifying glass with the bugs was from the freebies on the CM site.

Happy Scrappin’

Friday, March 12, 2010

12 X 12 page from Nanci Cernak

Nanci template - Page 051

Nanci Cernak created this page and has shared it with the Facebook group at “I *heart* Creative Memories!”  What a fun page to use, thank you Nanci! 

Happy Scrappin’

Wednesday, March 10, 2010

12 x 12 Page

flowers - spring - Page 011  

To create this page I added the background paper, then created a photo mat that was 12 x 12 and used the Maple leaf edges, that are on the format photos ribbon. Then I filled it with the same background apply a 3-D filter to the that layer.  Paper is from the Classic Spring additions as are the flowers, bird, and butterfly.

 
Happy Scrappin’

Monday, March 8, 2010

Tameka Bond webinars

Tameka gives some wonderful new ideas.  Here are a few links to her webinars. 

Blended Photos Tidbit

Alignment Section of the Arrange Tab

Blended photos

Tameka is a fantastic teacher with great ideas.  These webinars are a must. 

Happy Scrappin’

Tuesday, March 2, 2010

Photography by Nick Kelsh

image

How to photograph your baby by Nick Kelsh (click on the link)

Use Nick’s tips for all you picture taking needs.  He has some really good tips and helps that will teach you how to take better photos.

Monday, February 22, 2010

Copying a page to a different project

Have you created a page in one project and want it to be part of your calendar?  Or wanted to copy a calendar page and make it apart of one of your StoryBooks?  Well here is the answer for you.  This is an easy process and you can have 3 projects open at one time.  Just make sure that both projects are open and ready to copy and paste the pages either way. 

This webinar will teach you how to copy a page and paste it into another project.  Also covered in this webinar is Keywords and organizing your contents.  There are also many other useful tips.  Copying a page webinar link.
Happy Scrappin’

Copy & Paste Text

Here is a tip that will allow you to copy text from a word processor, the internet or any other program.  When you are doing your journaling you do not need to retype text that is already typed in a word processor. 

Copy and paste text - Page 068

You can copy text from a word processing program, from the internet or any program you have typed text in.  To accomplish this:

  • go to your word processing program
  • open the document
  • left click, hold and drag to highlight the desired text
  • right click on top of the highlighted text and choose copy
  • go to your StoryBook project where you want to paste the text
  • click on the insert ribbon
  • click the down arrow on text
  • choose "place clipboard text on page"adjust your text box to fit your text

Following these instructions will save you a few steps when copying text and pasting into a Storybook Project.

This page was created using the Simply Beautiful Digital Power Palette. 

Sunday, February 14, 2010

Importing pages from other projects

importing pages - Page 005

To copy a project page to a calendar project.

  • open both projects (you can have 3 projects open at one time)
  • make sure that all elements are unlocked
  • on the project you want to copy the page from, left click, hold and drag from the upper left corner to the bottom right corner.  This will copy every element.  Do not copy the calendar area.
  • your screen would look like this one.
  • next you can right click and choose copy, or hold the CTRL key while pressing the C key.  This will copy every element.
  • go to your second project where you want to paste the page to.
  • right click on the new page and choose paste or hold the CTRL key while pressing the V key.  This will paste what you have copied from your project page, to the calendar page in your new project.

This feature lets you copy from a project (book) where you have created your pages for books or page prints and then will let you copy them to a calendar project.  Using this feature you are able to print page prints for $1.75, when you order a calendar.  Even if you do not use the calendar part of the calendar, your page prints are beautiful quality and at a cheaper price. 

Note:  This process can be reversed, if you have created a beautiful calendar page and you want to use that page in your book. 

Saturday, February 6, 2010

Welcome Page of StoryBook

ScreenShot044

Just as a little reminder on the Welcome page of Storybook are some very helpful items.  At the top row there are the following choices:

  1. Create a new project
  2. Open an existing project
  3. Check for pricing and content (this takes you to the CM site for purchasing. Please make sure you use your Consultants website for purchases!)
  4. Manage my content (this is where you organize, import new packages, enter the activation codes and create keywords)
  5. Tutorials (here you will find two webinars and more tutorials online link)  The first choice is Virtual Tour, Second is Getting Started and then at the bottom left is the link for View more tutorials online.)  Everyone of these are very helpful and will teach you more about the programs. 
  6. User settings. (use this option to make your personal settings for the program)  You can also change the directory of where your content and packages are located if you have them stored on a different drive than the “C drive”
  7. Then there is the Blue ? – this is where you can search the help contents, User Guide,  Tutorials, User Settings and About (the program information and serial number)

At the bottom make sure you check for updates to the program.  This is in the bottom left corner and if your software is up to date it will tell you.

Happy Scrappin’

Thursday, February 4, 2010

Webinar fix

If you could see me now, I am so excited and just jumping out of my chair.  Kevin Klar of Creative Memories came to the rescue with the link that would fix our webinars.

If you have been one of the people that use Windows 7 and the webinars are not working and the error you get is “video codec error,” here is the fix.

Click this link G2M3 download, then click the “Install GotToMeeting Codec”  You will then be able to view every webinar on this website. 

A HUGE thank you to Kevin Klar!!!

Photos as backgrounds

Frangipani's - Page 063

This page was created in a about 10 minutes using the Simple Click and Fill pages 12 x 12 from Creative Memories.  I used one of the photos as the background, which gave this page just the look that was intended.  The font for the title is Edwardian Script and the text box is Andy.  The paper in the center is from the Vintage Digital Power Palette.  Happy Scrappin’

Tuesday, January 26, 2010

Copying/Backing up your CM packages and books

backing up storybook - Page 005

I have been asked many times how to back up files, and decided to come up with an instruction page.  Please remember there are many ways to back up your files and this is the way I choose to do it.  I have checked out back up programs and have not yet found one I like.  A lot of the backup programs condense your files and you can not just open them.  You would have to restore the backup which is not an option for me. 

This method is how I back up ALL my data files, not just CM files.  Please click on the page to better read the instructions.

If you have any questions that I can help you with, please feel free to contact me.

Cathie

Monday, January 25, 2010

New Webinars

If you are interested in learning more about StoryBook Creator 3.0 and Memory Manager 3.0.  There are lots of webinars posted here on the blog.  They are on the side bar under “Creative Memories Webinars” and “Webinars page 2” 

When you watch these webinars, you need Windows Media Player to view them.  I like to watch a little and then pause the play and practice what was just watched. 

If you have any requests for other webinars, please email me at bobsiglow@msn.com

When you learn the software, there is so much more you can do with your pages and photos. 

The very latest webinar that was created is “Using the Simple Start” cd.  These pages are so much fun to play with and create beautiful pages.  Plus when you purchase the CD there is a coupon that can be used towards the printing of one of your StoryBook’s   Click here to order your copy of the Simple Start CD  There are 150 predesigned pages in this package.  Happy Scrapbooking!

Click the picture to watch the webinar on the Simple Start CDScreenShot018

Sunday, January 17, 2010

Bubble making

bubble making - Page 061

To make the bubbles:

  • Select the Silver Glass brad from the Digital Embellishments office supply kit.  You can also use the same brad from the gold kit.
  • Use the ellipse cutter and cut the center out
  • Select your photo, use the ellipse cutter and cut out the part you want.  You will need to flatten your photo for it to be cut.
  • Use the Arrange feature to make the bubble and photo the same size.  I turned the opacity down to 75 to lighten up the white strip on the bubble.  

Wednesday, January 13, 2010

Color Wash and Adjust Hue

Have you ever liked the layout of a page but not wanted the color?  Here is a sample of the original page and the page changed using the Color wash and Adjust hue features found on the Color ribbon. 

Earthy orig - Page 019

Original page

Earthy changed - Page 018

Changed page

To change the background paper color make sure you unlock the element on the left side by un-clicking the little yellow lock.  You will have to select each element individually and change the colors according to your preference.

Add a little Bling to your pages

Bling Challenge - Page 020

This it the CM – Go Digital challenge #10 from the Facebook group.  This was so much fun and easy to do.  Here are your instructions on how to add bling your embellishments. 

Add the item to be "glitterized" to your project. While clicked on the item, click on the "Format" tab. Next, click on "Surfaces". Choose the very first surface option, "Block". Slide the "Amplification" selector all the way to the right, to number 10. Click "Accept".


Repeat the above process again. In most cases, this will yield you a bling-ish enough glitter finish. If you would like more, do it again.

Thanks to Miss Macy for teaching us this fun technique.

Happy Scrapping!!

Tuesday, January 12, 2010

Text and embellishment outlining

outline text

Jenny MacKay from Australia created this handout.  She gives some fantastic instructions on text, and how to make they look outlined. 

Thanks for sharing Jenny!

Sunday, January 3, 2010

Shaped photo in SBC 3.0

Shaped photo in SBC 3

Thanks to Jenny MacKay for creating this wonderful instruction sheet on how to create a shaped photo in SBC 3.0.  There was no reason for me to create an instruction sheet when she did such a fantastic job.  Isn’t it great how everyone shares ideas and how to’s on Facebook.  What an inspiration everyone is.  Here is a direct link to Jenny's page "creating a shaped photo"